Wednesday, December 30, 2009

Mark Bittman's Food Processor Baguettes

Sunday, December 27, 2009

I had no hope at all for this very simple recipe for baguettes. I don't even know what possessed me to try it, except that my daughter Elizabeth had asked me for a bread recipe that used a food processor, and my daughter Sarah had asked me for Bittman's How to Cook Everything as a Christmas present. When I was leafing through the new, improved version of the cookbook, I ran across the recipe for "Easiest and Best French Bread." Oh, right, I thought. Toss four simple ingredients into a food processor, and then, when you think of it, give them a little shaping and bake. I'm sure that's going to make a good baguette.

I don't know why, but this easy-as-pie recipe turned out a better baguette than the Peter Reinhart version I made a few weeks ago where I laboriously sieved whole wheat flour to try to approximate "clear flour." It's not at all fair that something this easy should turn out so good, but there you are. It's a recipe that you should try anytime you feel like turning out a flavorful baguette but you don't want to start the process three days ahead of time.

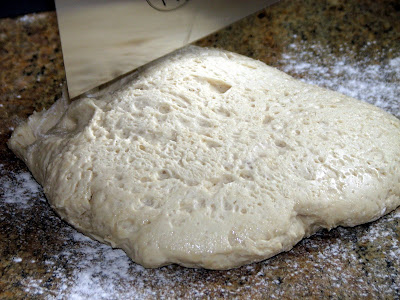
The recipe consists of flour, water, salt, and yeast. Everything goes in a food processor for about 30 seconds. You gather up the dough--it's pretty wet--put it in a bowl and let it rise for a few hours.
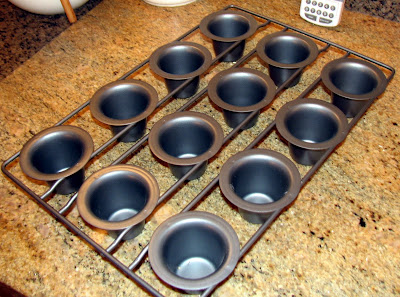
Shape it into three loaves and put them into a French bread pan.

Let them rise again, slash them, and put them in the oven.

Take them out a half-hour later.

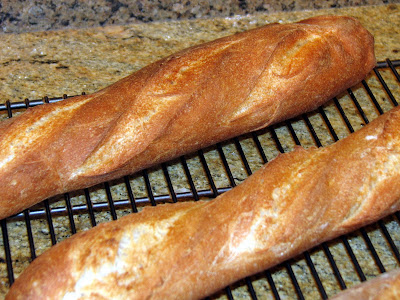
That's it! I don't know why one of the loaves looks so much more decorous than the other two--I guess the slashes weren't as deep.

I liked the way they looked when they came out of the oven. I liked the way they smelled. But I'd liked the way the poolish baguettes of a few weeks ago looked and smelled too, and then I was disappointed when I tasted them. But these tasted really good--so much better than I expected. I've considered the possibility that it was just my low expectations that made me so impressed with the way these loaves turned out. Since I expected nothing, any result above nothing would be good. But I don't think so. The outside is crusty but not hard, the inside is chewy and full of rich flavor. If I bought it at a bakery, I'd go back for more.
Everyone knows Mark Bittman is the one who popularized no-knead bread, the craze of a few years ago. But maybe it's this food processor baguette that really deserves the popularity.

Easiest and Best French Bread

--from How to Cook Everything, by Mark Bittman

3 1/2 cups (546 grams) bread flour
2 tsp. salt
1 tsp. instant yeast
1 1/2 cups water (or more)

1. Process flour, salt, and yeast for a few seconds in food processor, using the metal blade. With the machine running, pour most of the water through the feed tube. Process about 30 seconds, or until dough becomes a sticky, shaggy ball. If it doesn't feel sticky, add more water.

2. Turn dough into large bowl, and cover with plastic wrap. Let rise for two to three hours at room temperature.

3. Sprinkle a little flour on the counter, and cut dough into three equal pieces. Shape each into long roll, and place in a lightly floured baguette pan. Cover with a towel, and let rise for another one to two hours. (On a cold day, you'll need the full rising time).

4. About a half-hour before baking, put baking stone in oven, and skillet or pan on lowest shelf. Preheat oven to 450 degrees. When ready to bake, slash loaves with sharp knife and sprinkle lightly with flour. Put about 1/2 cup of ice cubes on pan on lowest shelf of the oven, and quickly put baguette pan on top of baking stone.

5. Spray sides of oven after five minutes and again after ten minutes.

6. Bake 25 to 35 minutes, until crust is golden brown. Cool on a wire rack.

Friday, December 25, 2009

Christmas Popovers

Friday, December 25, 2009

I usually make a big Christmas breakfast that tides us over until dinner, but today's dinner was going to be early, so I wanted to make something less hearty, but still festive. I decided on Greek yogurt, lightly sugared berries, and granola, but that menu seemed lacking in the festivity category. Suddenly, I thought of popovers. I haven't made them since the year I baked all the breads in The Bread Bible. 2006? Time sure flies when you're eating carbs. Fresh out-of-the-oven popovers with cherry preserves, orange marmalade, and some apricot filling left over from making Polish apricot Christmas cookies. Now that seems festive.

One of the great things about Rose's recipe for popovers is that they can be made ahead of time. I made them Christmas eve and put them in a little pitcher. I don't know why people (including me) are afraid of popovers. They couldn't be much easier. I'm going to have to make it my mission in life to convince people to make them. My former mission was to convince people to weigh ingredients when baking, but it seems that I got rather tiresome about that, or so I gathered when people started leaving the room when I merely mentioned how I loved my scale.

The trick is using Wondra flour. This is Rose's trick, not mine, but I will adopt it for my mission. Mix up Wondra flour, milk, eggs, a few tablespoons of melted butter, a bit of salt and a bit of sugar, and hey presto!

The other trick is in having a popover pan. I'm sure you can use muffin pans, but they are squatter and don't have the nearly straight sides of a specialized popover pan, which is worth buying even if you only use it twice in four years.

Of course, you could also use a full-sized popover pan, but I like to use the smaller ones, because they seem so tiny and harmless that you don't mind eating a second, or even, possibly, a third.


And a new Christmas tradition is born.

Monday, December 14, 2009

Poolish Baguettes

Saturday, December 12, 2009

When I was trying to think of a new bread to make this weekend, it occurred to me that I hadn't made a baguette in a very long time. I found this recipe in The Bread Baker's Apprentice, and it looked like I'd be able to bake it on Saturday while I was writing a brief. It worked out very well--I sat at the counter and typed away on my laptop (about what the burglary statute means by a "person in lawful possession") while occasionally checking the progress of this slow-rising dough.
All I had to do on Friday was mix up the poolish until it started its bubbling action, and then put it in the refrigerator overnight.

I made a whole recipe of poolish, and didn't realize until Saturday that I only needed a cup of it. The poolish was so lively and gluteny that I couldn't bear to throw it away, so I googled "freezing poolish." According to a source, whether reliable or unreliable I have yet to find out, poolish can be frozen for up to three months and used successfully if it's brought back to room temperature. We'll see.
The real fun started when I tried to approximate something called "clear flour." Reinhart says that you get this by sifting whole wheat flour and leaving behind the bran. He also says, not particularly helpfully, that most home sifters don't have fine enough holes to separate the flour from the bran. (Is this anything like separating the wheat from the chaff?) If there is not a sizeable amount of bran left behind in the sifter, he says, you'll know it's not working.

I sifted out only two pieces of bran from over a cup of flour, so I could see that this wasn't going to work. I searched my kitchen for something with finer mesh than a sifter, and came up with an ancient tea caddy. This actually worked pretty well.

However, since I could sift only about a tablespoon at a time, I got tired of it before I sifted through the entire 8 ounces, so I filled in with extra bread flour. (This is what Reinhart suggests if you can't sift away the bran, so I felt I had permission to do it that way). I did get a nice mountain of very finely sifted flour.

The dough came together nicely, and went into a bowl for a two-hour rise.

It looks a little like an angry mask, doesn't it? But after the first rising, and a little hand-kneading, it loses its angry appearance and just looks like bread dough.

Another few hours, and the dough is ready to divide and shape.

The dough scraper is one of those little gadgets that, once you have it, you don't see how you ever did without it.
The dough almost shaped itself into three baguettes.

I loved the way these baguettes looked when they came out of the oven--just the right deep brown color, and the kitchen smelled exactly the way your house is supposed to smell if you're trying to sell your house: warm, homey, yeasty, delicious.

Because it looked so beautiful, it was a bit of a letdown to taste the bread. It was good. It had a very nice wheaty flavor, but it didn't have the open, chewy texture that I was hoping for.

It wasn't bad at all, but I would have to say that it wasn't worth the time spent sifting flour through a tea caddy. I'd like to try something made with authentic "clear flour" sometime to see what this bread is supposed to taste like. Meanwhile, I'll look for other recipes to use up my frozen poolish, and hope I remember to do it sometime in the next three months.

Poolish Baguettes
--adapted from The Bread Baker's Apprentice, by Peter Reinhart

1 cup (7 ounces) poolish*
1 3/4 cups (8 ounces) whole wheat flour, sifted (or use all bread flour except for about 2 tablespoons of unsifted whole wheat flour)
2 cups (9 ounces) bread flour
1 1/2 tsp. (.37 ounce) salt
3/4 tsp. (.08 ounce) instant yeast
1 1/8 to 1 1/4 cups (9 to 10 ounces) water

1. Stir together the flours, salt and yeast in the bowl of an electric mixer. Add the poolish pieces and the water, and mix on low speed with the paddle attachment until the ingredients form a ball. Add more water or flour as needed, to create a dough that is soft but not sticky.

2. Knead on medium speed with dough hook about six minutes, until dough is soft and pliable. Lightly oil a large bowl and transfer the dough to the bowl, coating all over with oil. Cover bowl with plastic wrap.

3. Let rise about 2 hours, or until dough is nearly doubled in size. Remove dough from bowl and knead about a minute. Return to bowl and cover again.

4. Let rise another 2 hours until dough is doubled in size.

5. Divide dough in 3 pieces on a floured counter. Shape into baguettes. Putting them in a three-baguette pan works perfectly. Let rise another hour.

6. Preheat oven to 500. Place baking stone on lower third of oven. Slash baguettes with knife or razor blade, and put in oven. Create steam in oven by putting either about 1/2 cup ice cubes or 1 cup hot water in preheated pan on rack below the rack with the baking stone.

7. Spray additional water twice on oven walls at 30-second intervals, if desired, and then lower heat to 450. Bake for 10 minutes. Rotate pan, and bake for another 8 to 12 minutes, until bread is golden brown.

8. Remove bread from oven and let cool on a rack.


*Poolish (Makes about 23 ounces)

Stir together 2 1/2 cups (11.25 ounces) bread flour, 1 1/2 cups (12 ounces) water, and 1/4 tsp. instant yeast. Cover bowl with plastic wrap and ferment at room temp. for 3 to 4 hours, or until bubbly and foamy. Refrigerate it for up to 3 days. Remove from refrigerator an hour or two before using.